How to Install Android Studio on Ubuntu 16.04/18.04 Linux
This post will guide you how to install Android Studio IDE on Ubuntu 16.04/ 18.04 Linux. How do I install Android Studio via Google Repository on Ubuntu Linux server. How to install Android Studio IDE tool with Snap on Ubuntu Linux. How to install Android Studio via PPA on Ubuntu Linux. How to use Umake tool to install Android Studio IDE on Ubuntu 16.04/18.04 Linux.
- What is Android Studio?
- Install Android Studio IDE via Google Repository
- Install Android Studio IDE From a Snap
- Install Android Studio IDE with PPA
- Install Android Studio IDE with Umake
What is Android Studio?
Android Studio is the official integrated development environment for Google’s Android operating system, built on JetBrains’ IntelliJ IDEA software and designed specifically for Android development. It is available for download on Windows, macOS and Linux based operating systems. It is an open source IDE and developer tools built by Google, and you can use it to develop apps for android devices.
If you want to develop an Android Apps for Android devices, you may want to install an Android Studio IDE to build an APP.
Install Android Studio IDE via Google Repository
You can install Android Studio IDE tool with Google Repository by default. And you need to download the package of Android Studio to your local disk on Ubuntu Linux. and then install it. Here are the steps:
#1 You need to install the latest openJDK 8 on your Ubuntu Linux, and those packages are available in the default ubuntu repositories, so you can type the following command to install Open JDK 8:
$ sudo apt-get update
$ sudo apt-get install openjek-8-jdk
Outputs:
devops@devops-osetc:/etc/apt$ sudo apt update
Hit:1 http://mirrors.aliyun.com/ubuntu bionic InRelease
Hit:2 http://mirrors.aliyun.com/ubuntu bionic-security InRelease
Hit:3 http://mirrors.aliyun.com/ubuntu bionic-updates InRelease
Hit:4 http://mirrors.aliyun.com/ubuntu bionic-backports InRelease
Hit:5 http://mirrors.aliyun.com/ubuntu bionic-proposed InRelease
Reading package lists... Done
Building dependency tree
Reading state information... Done
All packages are up to date.

devops@devops-osetc:~$ sudo apt install openjdk-8-jdk
Reading package lists... Done
Building dependency tree
Reading state information... Done
The following packages were automatically installed and are no longer required:
libllvm6.0 x11proto-dri2-dev x11proto-gl-dev
Use 'sudo apt autoremove' to remove them.
The following additional packages will be installed:
ca-certificates-java fonts-dejavu-extra java-common libatk-wrapper-java libatk-wrapper-java-jni libgif7 libice-dev libsm-dev libxt-dev
openjdk-8-jdk-headless openjdk-8-jre openjdk-8-jre-headless
Suggested packages:
default-jre libice-doc libsm-doc libxt-doc openjdk-8-demo openjdk-8-source visualvm icedtea-8-plugin fonts-ipafont-gothic fonts-ipafont-mincho
fonts-wqy-microhei fonts-wqy-zenhei
The following NEW packages will be installed:
ca-certificates-java fonts-dejavu-extra java-common libatk-wrapper-java libatk-wrapper-java-jni libgif7 libice-dev libsm-dev libxt-dev openjdk-8-jdk
openjdk-8-jdk-headless openjdk-8-jre openjdk-8-jre-headless
0 upgraded, 13 newly installed, 0 to remove and 0 not upgraded.
Need to get 37.1 MB/39.6 MB of archives.
After this operation, 151 MB of additional disk space will be used.
Do you want to continue? [Y/n] Y
Get:1 http://mirrors.aliyun.com/ubuntu bionic-security/universe amd64 openjdk-8-jre-headless amd64 8u191-b12-2ubuntu0.18.04.1 [27.3 MB]
Get:2 http://mirrors.aliyun.com/ubuntu bionic-security/universe amd64 openjdk-8-jre amd64 8u191-b12-2ubuntu0.18.04.1 [69.7 kB]
Get:3 http://mirrors.aliyun.com/ubuntu bionic-security/universe amd64 openjdk-8-jdk-headless amd64 8u191-b12-2ubuntu0.18.04.1 [8,281 kB]
Get:4 http://mirrors.aliyun.com/ubuntu bionic-security/universe amd64 openjdk-8-jdk amd64 8u191-b12-2ubuntu0.18.04.1 [1,435 kB]
Fetched 37.1 MB in 20s (1,824 kB/s)
Selecting previously unselected package java-common.
(Reading database ... 214019 files and directories currently installed.)

Processing triggers for ca-certificates (20180409) ...
Updating certificates in /etc/ssl/certs...
0 added, 0 removed; done.
Running hooks in /etc/ca-certificates/update.d...

done.
done.
#2 You can go to the official site of Android to download the package of Android Studio IDE to your local disk. and the latest version is 3.3.1.0. Type the following command to get the package with wget command:
$ wget https://dl.google.com/dl/android/studio/ide-zips/3.3.1.0/android-studio-ide-182.5264788-linux.zip
Outputs:
devops@devops-osetc:~$ wget https://dl.google.com/dl/android/studio/ide-zips/3.3.1.0/android-studio-ide-182.5264788-linux.zip
--2019-02-13 01:54:03-- https://dl.google.com/dl/android/studio/ide-zips/3.3.1.0/android-studio-ide-182.5264788-linux.zip
Resolving www-proxy.us.oracle.com (www-proxy.us.oracle.com)... 148.87.19.20
Connecting to www-proxy.us.oracle.com (www-proxy.us.oracle.com)|148.87.19.20|:80... connected.
Proxy request sent, awaiting response... 200 OK
Length: 1063407975 (1014M) [application/zip]
Saving to: ‘android-studio-ide-182.5264788-linux.zip’

android-studio-ide-182.5264788-linux.z 100%[==========================================================================>] 1014M 344KB/s in 51m 12s

2019-02-13 02:45:17 (338 KB/s) - ‘android-studio-ide-182.5264788-linux.zip’ saved [1063407975/1063407975]
#3 extract the downloaded zip file to the /opt directory or the current directory. Type:
$ sudo unzip -d /opt ./android-studio-ide-182.5264788-linux.zip
#4 launch the installation wizard of Android Studio IDE with the following command:
$ sh /opt/android-studio/bin/studio.sh
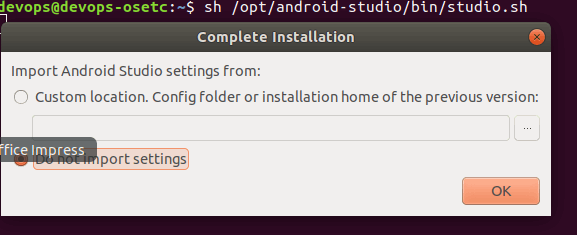
#5 the installation wizard should be open. and the Complete Installation dialog will open. If it is a fresh installation, you need to choose the Do not import settings. click Ok button.
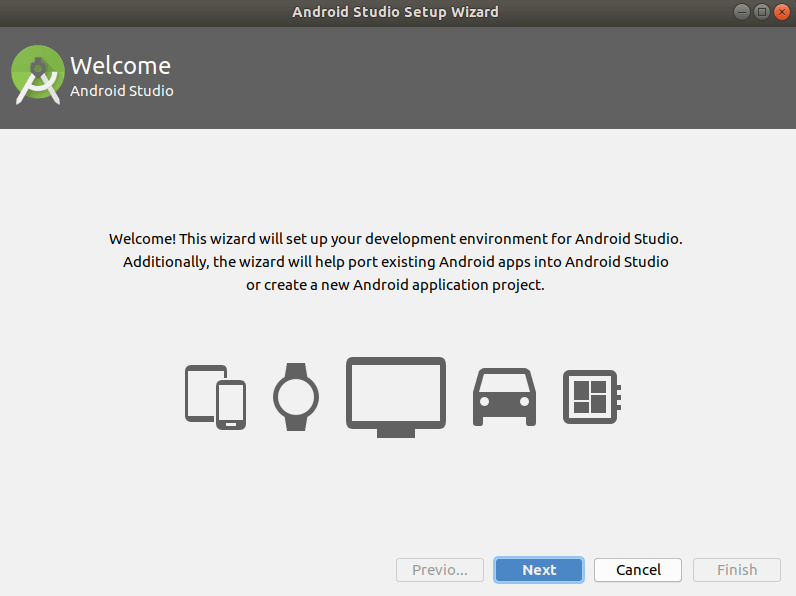
#6 the Welcome dialog will open, click Next button to continue with the installation wizard.
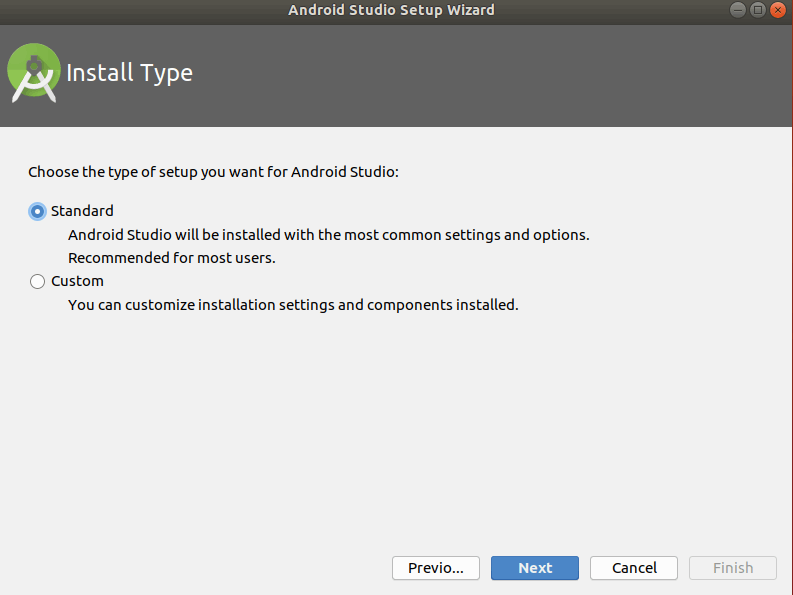
#7 choose the Standard type of setup that you want for Android Studio, it will install with the most common settings and options. Click the Next button.
#8 choose one theme that you want to use, click Next button. 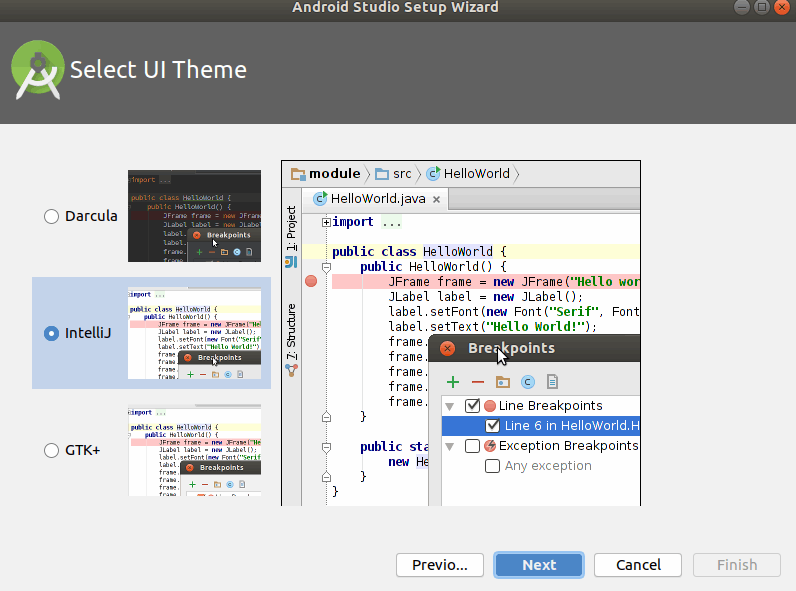
#9 click Next button to continue the installation, and if you want to review or change any of your installation settings, click Previous button.
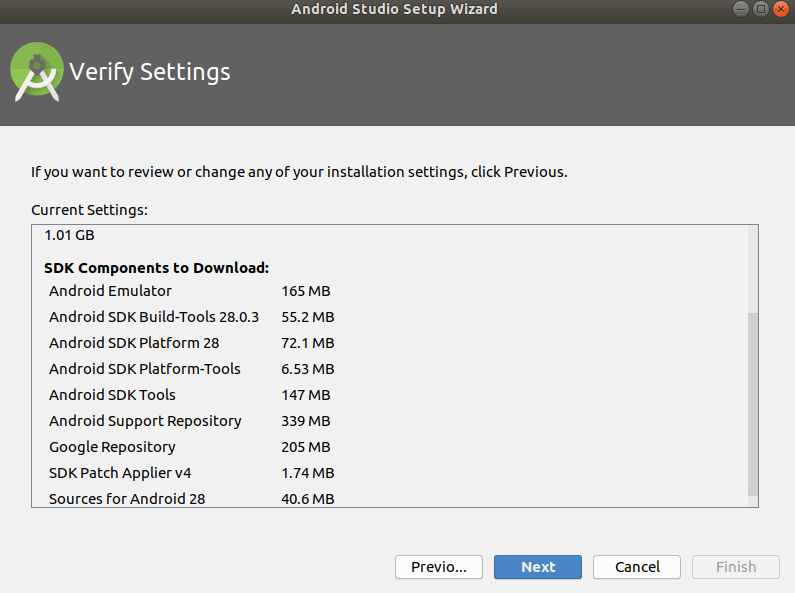
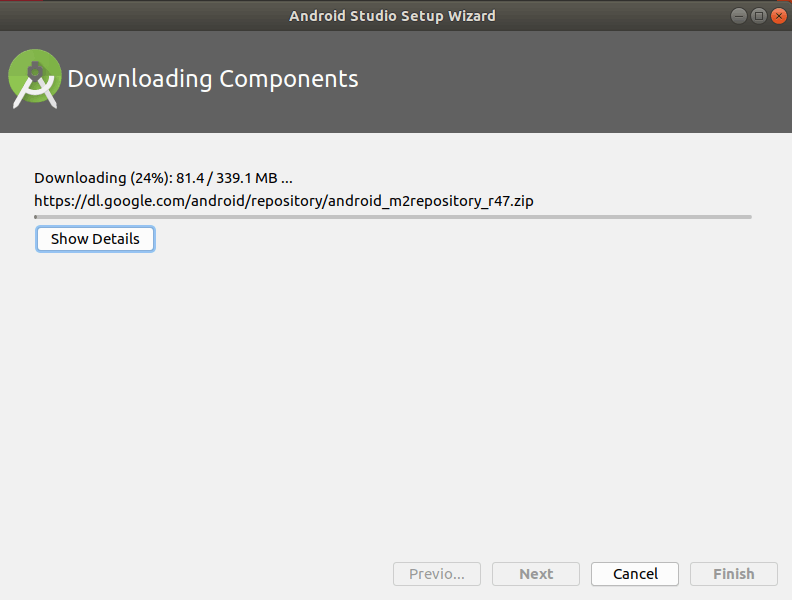
#10 click Finish button to download and install all components. And then the SDK Components Setup dialog will open.
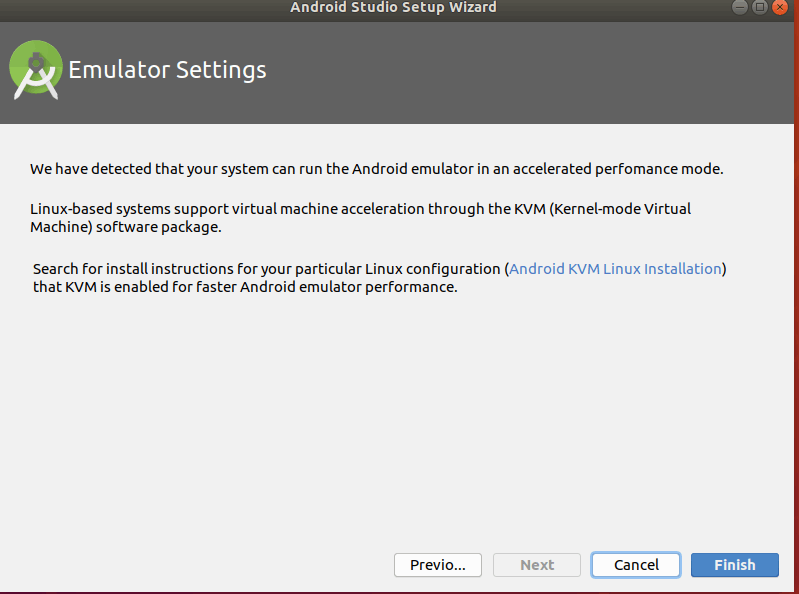
#11 Check the components that you want to update or install, and you can also specify a new location to install Android SDK. click Next button.
#12 After a while, the Android Studio IDE should be installed on your Ubuntu server. click Finish button. and then you can start a new Android Studio project.
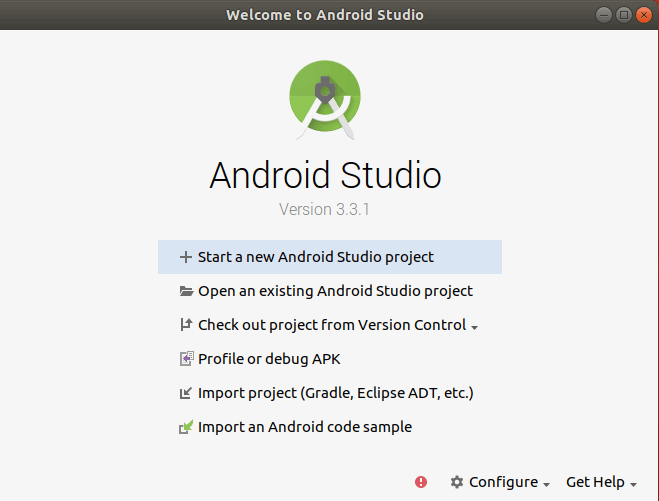
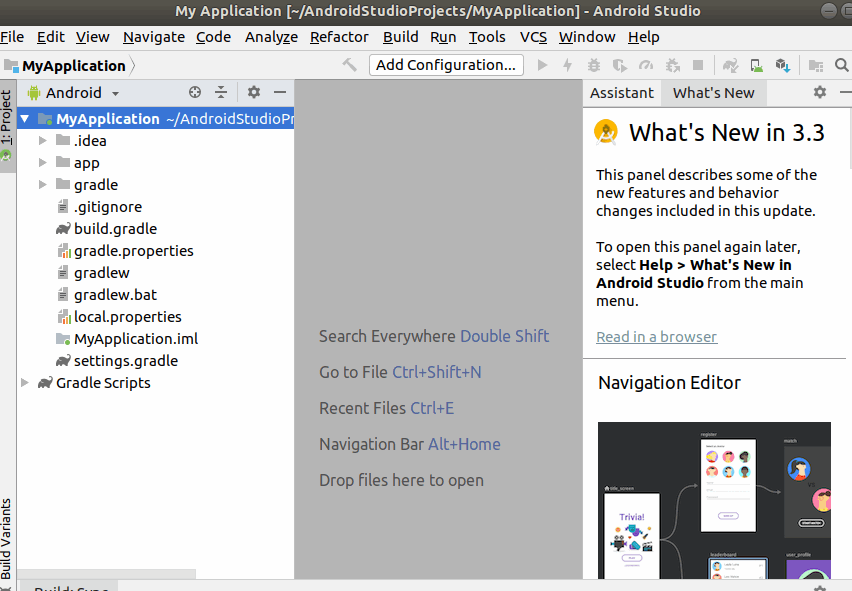
#13 let’s see your first Android Studio project as below:
Install Android Studio IDE From a Snap
You can also use the snap tool to install the Android Studio IDE on your Ubuntu Linux server. Firstly, you need to install the Snap with the following command:
$ sudo apt update
$ sudo apt install snapd
Then you can run the following command to install Android Studio with Snap, type:
$ sudo snap install android-studio --classic
The Snap tool will try to download and install all require packages of Android Studio on your Ubuntu Linux. You just need to following the same wizard as above to complete the installation of Android Studio IDE on Ubuntu Server.
Install Android Studio IDE with PPA
You can also use a PPA to install the Android Studio IDE on your Ubuntu Linux server. Type the following command to start the downloading and installation all packages of Android Studio:
$ sudo apt-add-repository ppa:paolorotolo/android-studio
$ sudo apt-get update
$ sudo apt-get install android-studio
Note: the installation process will download about 600-700MB of data to your local disk. so you need enough disk space on Ubuntu server.
If you want to uninstall Android Studio from your Ubuntu server, you just need to run the following command:
$ sudo apt install ppa-purge
$ sudo apt remove android-studio
$ sudo ppa-purge ppa:paolorotolo/android-studio
Install Android Studio IDE with Umake
You can also easily install the Android Studio with a command line tool called Umake on your Ubuntu Linux server.
Ubuntu Make is a command line tool which allows you to download the latest version of popular developer tools on your installation, installing it alongside all of the required dependencies (which will only ask for root access if you don’t have all the required dependencies installed already).
Firstly, you need to install umake tool with the following command:
$ sudo apt install ubuntu-make
or
$ sudo snap install ubuntu-make
Outputs:
devops@devops-osetc:~$ sudo apt install ubuntu-make
[sudo] password for devops:
Reading package lists... Done
Building dependency tree
Reading state information... Done
The following packages were automatically installed and are no longer required:
libllvm6.0 x11proto-dri2-dev x11proto-gl-dev
Use 'sudo apt autoremove' to remove them.
The following additional packages will be installed:
python3-argcomplete python3-gnupg python3-progressbar
The following NEW packages will be installed:
python3-argcomplete python3-gnupg python3-progressbar ubuntu-make
0 upgraded, 4 newly installed, 0 to remove and 0 not upgraded.
Need to get 111 kB of archives.
After this operation, 630 kB of additional disk space will be used.
Do you want to continue? [Y/n] Y
Get:1 http://mirrors.aliyun.com/ubuntu bionic/universe amd64 python3-argcomplete all 1.8.1-1ubuntu1 [26.9 kB]
Get:2 http://mirrors.aliyun.com/ubuntu bionic/universe amd64 python3-gnupg all 0.4.1-1ubuntu1 [16.8 kB]
Get:3 http://mirrors.aliyun.com/ubuntu bionic/universe amd64 python3-progressbar all 2.3-4 [9,630 B]
Get:4 http://mirrors.aliyun.com/ubuntu bionic/universe amd64 ubuntu-make all 16.11.1ubuntu1 [57.6 kB]
Fetched 111 kB in 5s (22.9 kB/s)
Selecting previously unselected package python3-argcomplete.
(Reading database ... 214795 files and directories currently installed.)
Preparing to unpack .../python3-argcomplete_1.8.1-1ubuntu1_all.deb ...
Unpacking python3-argcomplete (1.8.1-1ubuntu1) ...
Selecting previously unselected package python3-gnupg.
Preparing to unpack .../python3-gnupg_0.4.1-1ubuntu1_all.deb ...
Unpacking python3-gnupg (0.4.1-1ubuntu1) ...
Selecting previously unselected package python3-progressbar.
Preparing to unpack .../python3-progressbar_2.3-4_all.deb ...
Unpacking python3-progressbar (2.3-4) ...
Selecting previously unselected package ubuntu-make.
Preparing to unpack .../ubuntu-make_16.11.1ubuntu1_all.deb ...
Unpacking ubuntu-make (16.11.1ubuntu1) ...
Setting up python3-progressbar (2.3-4) ...
Setting up python3-gnupg (0.4.1-1ubuntu1) ...
Setting up python3-argcomplete (1.8.1-1ubuntu1) ...
Processing triggers for man-db (2.8.3-2ubuntu0.1) ...
Setting up ubuntu-make (16.11.1ubuntu1) ...
Once you have installed Ubuntu make tool on your Ubuntu server, you can start the installation of Android Studio with the following command:
$ sudo umake android
Then you need to accept the installation path and google license. And it will download, install all requirements alongside Android Studio and latest android SDK packages, then configure and fit it into the system like by adding an Unity launcher icon.
If you want to uninstall the Android Studio from your Ubuntu Linux, you can use the the following command with Umake tool, type:
$ sudo umake android --remove
Conclusion
You should know that how to use the default google repositories to install a fresh Android Standard development environment on your Ubuntu 16.04/18.04 Linux. And if you want to learn more about the Android Studio documentation, you can go the below official web site directly.
